Jumat, 03 Juni 2011
Rabu, 01 Juni 2011
Sabtu, 14 Mei 2011
Skin Textures
Open the picture you want to manipulate. Go to IMAGE > ADJUSTMENTS > DESATURATE. Then go to IMAGE > ADJUSTMENTS > CURVES and pull the red curve until it’s similiar to the picture below. Then select the lips and go to curves and pull the blue and green curve to get the same color as below.
And now it’s time to fix the eye. Open a picture of an eye and select the centre of the eye. Paste the centre onto a new layer. Go to FILTER > LIQUIFY and strech the pupil. If you have an old version of photoshop yo can use the smudge tool instead, But be sure to put the opacity to 100%. Once you’re done making the pupil nice and long, drag the layer you made earlier over to your lizard picture. Now scale the eye to fit over the original eye by going to EDIT > TRANSFORM > SCALE. Desaturate the eye and adjust it in curves to get that green look. Use any color you want, but i think green is the best lizard eyecolor.
Paste a texture similiar to the one below over the picture. Change the opacity of the texture to 50% and put the layer in “Color Burn”. Then paste a picture of some cracked paint over the face (Light Green). Cut out the area with hair and eyes. Change the opacity to 50% and put the layer in “MULTIPLY”.
Paste a texture of a coral over image as seen below. Invert the coral texture and cutout the hair, eyes, and mouth. Then put the layer in “OVERLAY”. This is the point where you fine tune your layers. Maybe remove some light or dark spots and soften the edges of the lips, eye hair, etc.
other examples :
Light
- Open a image a forrest. In this one you need to know a little about how light falls, you can study different images with falling light to get better clue. Now, use the Polygon Lasso Tool and make a selection the way you’d like the light to fall. Create a new layer and fill it with white.
- Deselect and go to FILTER > BLUR > BLUR MORE. Then Press CTRL+F about ten times. Now adjust the layer opacity to 90% and put the layer in OVERLAY. You’re done.
Glowing Strings
- Select the Polygon Lasso Tool
- Create a New Layer
- Make a thin Triangle Selection
- Select the Paint Bucket and fill with color of your choice
- Deselect and go to FILTER > DISTORT > SHEAR
- Bend the line and apply
- Double-click on new layer to enter "Layer Style" and click on OUTER GLOW
- Select Color and enter this Setting: OPACITY: 50, NOISE: 1, SPREAD:2, SIZE:random, RANGE: 62, JITTER: 8.
- Apply and repeat until you satisfied.
Kamis, 31 Maret 2011
Basic Compositing Pictures
there is a way to take multiple images and combine them into one composite or collage. With photoshop we can blending images together in beautiful and creative ways.


- Open a couple image (2 images) that you want to combine.

- Make sure that the mode of color are same. (Both are adjusted with the menu command Image> Mode).
- Use the SHIFT key and drag an image to copy the picture to the other.

- Use CTRL+T command to transform the image. Resize and move as desired.


- After images are together and sized, they need to be positioned. Lowering the opacity of the top layer allows you to see what you're doing as you reposition the layers.

- Use the Eraser tool in the toolbox and choose a huge soft brush. Set the specifications. Make sure that the brush hardness is set to zero.


- Select the upper layer, and move the cursor from the top to the bottom of the image where the two pictures meet and Shift-click.

- Finally: it's te RESULT. :D

Coloring Grayscale Image
There is a way to add some color into your grayscale image. It's easy and just take a few steps.
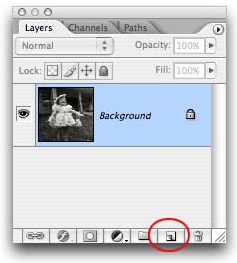
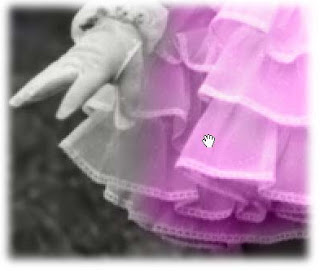
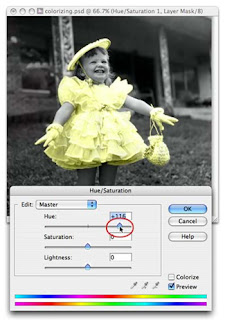
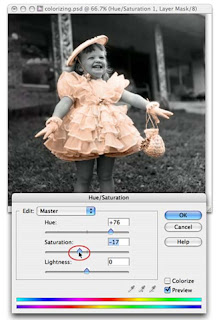
- Open an image in your Photoshop
- Make sure the document is set to either RGB or CMYK. because if your image mode is grayscale mode, you won't be allowed you to paint in color.
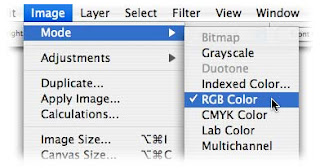
- Create a new layer.

- Change the blending mode of the new layer to either Color or Overlay.

- Use the Brush tool (shortcut B), choose a color (foreground color) that you want to color the image.

- Then, brush the part in your image that you want to colorize it.
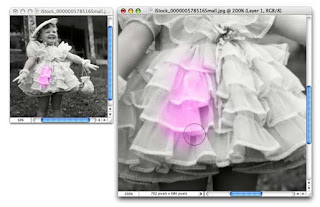
- Use the eraser (shortcut E) if you want to erase the color if it out of patch. use the combination of Brush, resize brush, eraser, and zoom tools.

- Finally, your grayscale image is colored now.
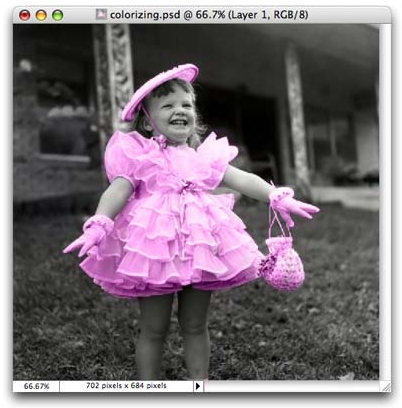
- Some tips: you can change the color by using hue/saturation. you can find it in Image > Adjustments > Hue/Saturation.


- Happy Coloring :D
Langganan:
Postingan (Atom)


